Hole 1
Par 4
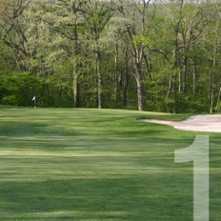 An elegant and inviting downhill opener with beautiful views of the surrounding hills.
Many will use a fairway wood or hybrid off the tee but the aggressive can go for the green and make the second shot a short pitch and follow it with a short putt.
| Hole 1 | |
| Par | 4 |
| Hdcp(M) | 17 |
| Hdcp(W) | 15 |
| Black | 359 yards |
| Blue | 346 yards |
| White | 334 yards |
| Yellow | 300 yards |
| Red | 298 yards |
Hole 2
Par 4
 Slightly narrower and slightly longer than the first, the second requires a straighter drive.
It’s particularly important to avoid a large tree on the left-hand side of the fairway. Accurate club selection is vital on the second shot as the green is one of the largest on the course.
| Hole 2 | |
| Par | 4 |
| Hdcp(M) | 13 |
| Hdcp(W) | 11 |
| Black | 379 yards |
| Blue | 371 yards |
| White | 355 yards |
| Yellow | 339 yards |
| Red | 290 yards |
Hole 3
Par 3
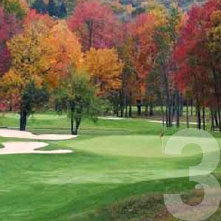 The first of four excellent par-3s, the beautiful third plays all downhill to a green with three large and ominous bunkers that protect.
During dry conditions, a run-up shot is possible; short and straight is a good miss. A back tier hole location makes the hole at least half a shot more difficult. Even though it’s all downhill, play to the yardage.
| Hole 3 | |
| Par | 3 |
| Hdcp(M) | 9 |
| Hdcp(W) | 7 |
| Black | 227 yards |
| Blue | 203 yards |
| White | 196 yards |
| Yellow | 178 yards |
| Red | 178 yards |
Hole 4
Par 5
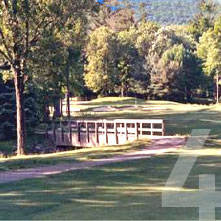 The yardage will make most think that the 4th is an easy birdie but it should be treated with respect.
The sharp dogleg left and the stream close to the optimum landing area for the approach conspire to generate any number of double bogeys—or worse. The better golfer will try to reach the green in two with two epic shots but a routine five is an excellent score.
| Hole 4 | |
| Par | 5 |
| Hdcp(M) | 5 |
| Hdcp(W) | 1 |
| Black | 491 yards |
| Blue | 480 yards |
| White | 456 yards |
| Yellow | 432 yards |
| Red | 420 yards |
Hole 5
Par 4
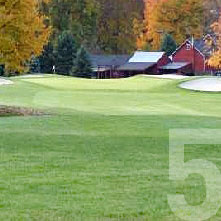 Although a shortish, slightly downhill par 4, the key to a possible birdie here is an approach shot to the correct side of the green.
A ridge splits the putting surface. A large, raised bunker front and right of the green gets some action and must be avoided.
| Hole 5 | |
| Par | 4 |
| Hdcp(M) | 15 |
| Hdcp(W) | 17 |
| Black | 357 yards |
| Blue | 347 yards |
| White | 330 yards |
| Yellow | 321 yards |
| Red | 271 yards |
Hole 6
Par 4
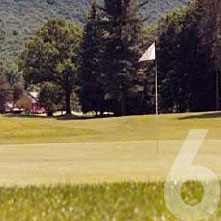 Longer than previous par 4s and mostly uphill, the 6th is a tough par.
The journey begins with a serious tee shot to a fairway that a bunker and large pine protect. Then it’s a long approach to a small and subtly undulating green. Par is an excellent score.
| Hole 6 | |
| Par | 4 |
| Hdcp(M) | 3 |
| Hdcp(W) | 3 |
| Black | 428 yards |
| Blue | 418 yards |
| White | 396 yards |
| Yellow | 372 yards |
| Red | 301 yards |
Hole 7
Par 4
 Another muscular par 4.
The tee shot is one of the most difficult on the course: it’s slightly downhill, but the fairway is narrow and there are two horrific bunkers flanking each side. Even though it’s a long hole for most, a fairway wood is a good play. The sloping green punishes the golfer who leaves a putt above the hole.
| Hole 7 | |
| Par | 4 |
| Hdcp(M) | 1 |
| Hdcp(W) | 5 |
| Black | 434 yards |
| Blue | 423 yards |
| White | 398 yards |
| Yellow | 378 yards |
| Red | 295 yards |
Hole 8
Par 3
 Thus far, Bowling Green has been relatively free of water.
This changes at the 8th, a solid par 3 almost completely over a large pond. Those of you who opted for the tips may rue your decision at this point! Bunkers surround the green but the putting surface is thankfully fairly flat. Those hitting the green could conceivably sneak away with a birdie.
| Hole 8 | |
| Par | 3 |
| Hdcp(M) | 7 |
| Hdcp(W) | 13 |
| Black | 215 yards |
| Blue | 201 yards |
| White | 176 yards |
| Yellow | 157 yards |
| Red | 117 yards |
Hole 9
Par 5
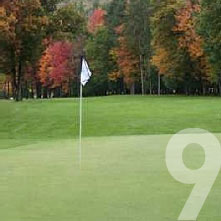 Those who find the narrow fairway with the driver on this dogleg right are in great shape to go for the green in two shots.
– even though the green is not receptive to long irons and fairway woods. However, a birdie to end the front nine is a distinct possibility.
| Hole 9 | |
| Par | 5 |
| Hdcp(M) | 11 |
| Hdcp(W) | 9 |
| Black | 480 yards |
| Blue | 470 yards |
| White | 461 yards |
| Yellow | 438 yards |
| Red | 368 yards |
Hole 10
Par 4
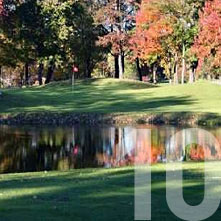 The back at Bowling Green begins with a tough and exciting test.
There’s plenty of room off the tee but it’s the second shot over a pond to a severe green with a buried elephant in the middle that requires a decisive approach. As you walk down the fairway, check the pin position on the 11th.
| Hole 10 | |
| Par | 4 |
| Hdcp(M) | 8 |
| Hdcp(W) | 6 |
| Black | 405 yards |
| Blue | 391 yards |
| White | 379 yards |
| Yellow | 340 yards |
| Red | 288 yards |
Hole 11
Par 3
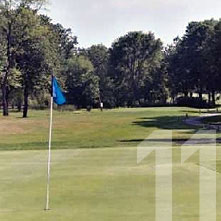 A straightforward short hole.
The bunkers fronting the green make depth perception tricky so trust the yardage and take at least an extra club if the hole is back on this large green. The 11th is the easiest of the par 3s at Bowling Green but it’s no pushover.
| Hole 11 | |
| Par | 3 |
| Hdcp(M) | 18 |
| Hdcp(W) | 18 |
| Black | 190 yards |
| Blue | 180 yards |
| White | 160 yards |
| Yellow | 120 yards |
| Red | 120 yards |
Hole 12
Par 4
 No bunkers on this hole but none required on this dogleg left par 4.
The best spot in the fairway is right-center but finding the fairway is an excellent result as there’s water right and hazard left. The second shot plays to a peninsula green. Got par? Take it to the bank!
| Hole 12 | |
| Par | 4 |
| Hdcp(M) | 4 |
| Hdcp(W) | 8 |
| Black | 408 yards |
| Blue | 387 yards |
| White | 371 yards |
| Yellow | 330 yards |
| Red | 283 yards |
Hole 13
Par 4
A short par 4 that should be a drive then a pitch to the green.
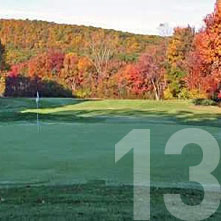 The best position off the tee is left center on this dogleg to the right. After the tough opening to the back nine, a welcome breather.
| Hole 13 | |
| Par | 4 |
| Hdcp(M) | 14 |
| Hdcp(W) | 14 |
| Black | 359 yards |
| Blue | 316 yards |
| White | 303 yards |
| Yellow | 265 yards |
| Red | 265 yards |
Hole 14
Par 5
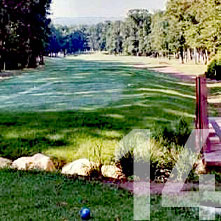 The drive looks tight off the tee but the landing area is wide.
So, it’s perfect to let it fly with the big stick. Only the biggest hitters will reach the green in two but the large, flattish putting surface welcomes a dart-like wedge.
| Hole 14 | |
| Par | 5 |
| Hdcp(M) | 12 |
| Hdcp(W) | 12 |
| Black | 357 yards |
| Blue | 518 yards |
| White | 491 yards |
| Yellow | 456 yards |
| Red | 355 yards |
Hole 15
Par 4
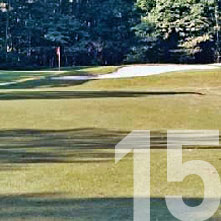 Perhaps the last chance to collect a birdie yet two large bunkers short and left of the green must be avoided.
Still, for most golfers, it’s just a drive or fairway wood and a wedge to set up a welcome three.
| Hole 15 | |
| Par | 4 |
| Hdcp(M) | 16 |
| Hdcp(W) | 16 |
| Black | 354 yards |
| Blue | 337 yards |
| White | 320 yards |
| Yellow | 298 yards |
| Red | 258 yards |
Hole 16
Par 3
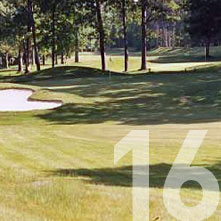 The final par 3 at Bowling Green plays downhill to a long green with a tough clover-leaf bunker defending left side hole locations.
Shots that land short of the green typically stick, leaving a tricky pitch or chip If you’ve made par on all four short holes, you join a small club that has Conquered The Threes!
| Hole 16 | |
| Par | 3 |
| Hdcp(M) | 10 |
| Hdcp(W) | 10 |
| Black | 214 yards |
| Blue | 203 yards |
| White | 175 yards |
| Yellow | 145 yards |
| Red | 145 yards |
Hole 17
Par 4
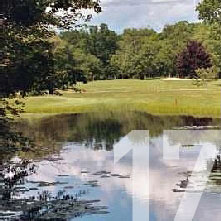 The penultimate hole (next to last) at Bowling Green plays longer than the yardage.
Long hitters need to pay attention to a small pond left of the fairway. The green has a false front that rejects moderately-struck shots, leaving a testy test. Putts from above the hole are never easy at the 17th.
| Hole 17 | |
| Par | 4 |
| Hdcp(M) | 6 |
| Hdcp(W) | 4 |
| Black | 415 yards |
| Blue | 408 yards |
| White | 375 yards |
| Yellow | 347 yards |
| Red | 336 yards |
Hole 18
Par 5
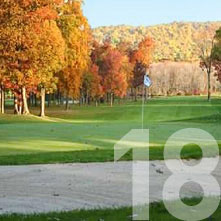 An epic finishing hole with wonderful views where just about anything is possible.
A well struck drive crosses the ‘the road of honor.’ A straight and true second will set up a mid to short iron approach to a three-tiered and well-protected putting surface. There aren’t too many players on the Tour who will likely hit this green in two. Post a five here and plenty of lucre awaits.
| Hole 18 | |
| Par | 5 |
| Hdcp(M) | 2 |
| Hdcp(W) | 2 |
| Black | 611 yards |
| Blue | 585 yards |
| White | 568 yards |
| Yellow | 547 yards |
| Red | 463 yards |